{ biscuitwallah }

biscuits and other heavenly pursuits

June 18, 2012
by nyckid
3 Comments

miniature soft pretzels

So this is probably where I apologize for being gone for so long. But you know what? I bet that most of you really just don’t care about my schoolwork and this and that and blah blah blah and really want me to just get onto the pretzels since that is indeed the title of this post. So I will! But there is one reason I’ve been gone that you might wanna take a look at.

don’t worry my mom didn’t have another baby. it’s just my aunt’s.

So yeah. You’ll forgive me, right.

Anyway. Why pretzels? Well you see, father’s day was fast approaching. And I’ve had a long history of not really knowing what to get for him. You know, as a present. I mean sure, I always got something for him — but it was usually some weird clay formation I made in art or some cookies. You see, cookies are great because they really don’t require any thinking, but people think that you put a lot of effort into them. That’s where the problem is, though. My dad doesn’t like dessert! (I know, he’s weird.). Don’t worry I’ve tried to convert him, but it gets to a point where shoving cakeballs down someone’s throat really just isn’t worth it. But as you can tell, my flawless backup present seems to have some flaws. So I decided to take it one step further and actually give him something he’d EAT instead of something he’d shove to the dark dusty depths of his desk or hide in some obscure corner of the fridge never to be seen again. My thought process: He likes pretzels. I’ve never made pretzels. I’ve never made anything with yeast. Sounds like a plan!

Of course that “plan” probably should’ve started earlier in the day. I might have gotten a little… distracted… and not started until like 6:00. What can I say. I’m overconfident in my baking skills, I guess.

Anyway, we’ll start with the elephant in the room here. Yeast! Yeeeeeeeaaaa. st. A lot of people are scared of yeast. And I’m a little ashamed to admit that I was indeed one of those people (I know, what kind of baker am I). But today marks the day that I decided to tackle the great beast!

Most 14 year olds are out partying with their friends. I’m at home writing a post on my food blog about yeast.

I’m so cool.

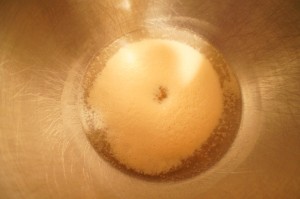
ANYWAY, I always thought that yeast would be some weird type of mexican jumping bean (they are alive, right?) but turns out they’re just these little pellets things. Dump them into a cup of warm water mixed with sugar and wait until…

…it looks like this! At this point I got all paranoid that I’d done something wrong and googled pictures of what active yeast should look like but turns out that this worked fine. So moral of story: yeast is hard to mess up.

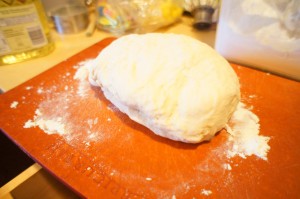
Okay. So I kind of forgot to take pictures during the last couple steps (well maybe I might have made a huge flour-y mess and wanted our two viewers to think that I am a neat and organized person) but either way you basically just attach a dough hook, add some flour, and mix the heck out of it (actually mix it on low. trust me).

Then plop it out onto a floured board and it should look like the above picture.

THEN

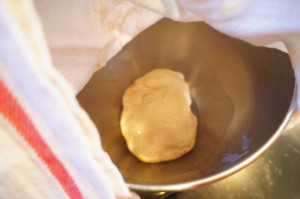
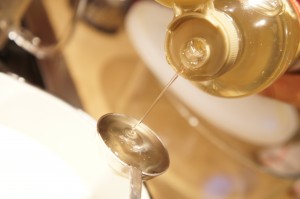
Pour a couple tablespoons of oil into a big clean bowl… and drop the doughball in. Make sure to roll the dough around in it to coat all the sides with oil!

At this point I was pretty thoroughly convinced by myself that the yeast had somehow died in the process and that it wouldn’t work… but I stuck the bowl in a warm place for a couple hours just to see what would happen…

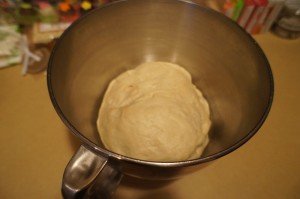
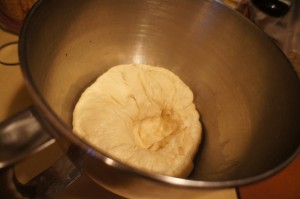
So imagine my surprise when I saw THIS

Woot woot! Today also marks the day when my yeast doubled in size!

I’m so cool, guys.

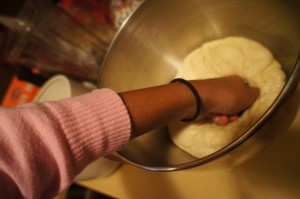
Anyway. Then you punch the dough. Like, punch it hard.

It’s really satisfying.

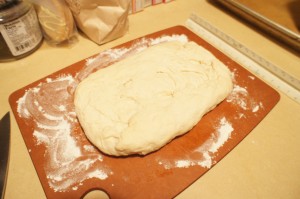
Then you plop it back onto that floured board and knead it a couple times. Squish it out into a vaguely rectangle-ish shape.

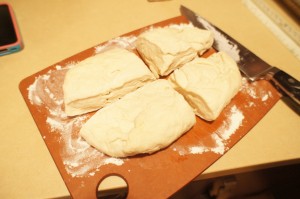
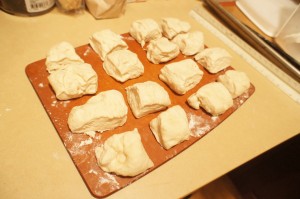
Okay. So at this point you’re supposed to cut the dough into 16 equal sized pieces. Using my conceptual math skills, I came up with this brilliant plan: cut the dough into four big chunks…

…and then cut those chunks into four chunks each.

Guys. Not only am I cool… but I’m also a math genius.

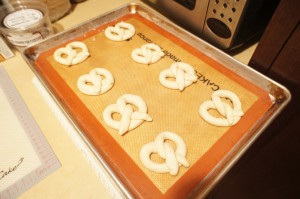
Basically what you should do is roll each chunk out to about a 15 inch strip, and then twist it into the pretzel shape you see above.

I probably should have given a little tutorial for how to twist them into the pretzel shape but honestly you can figure that out yourself, can’t you? Good.

(they’re so cute!)

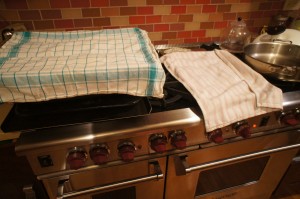
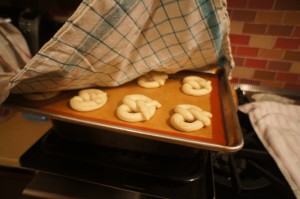
You should get about 8 pretzels per pan, and two pans. Cover each pan with a dishcloth or something and put them somewhere warm (like above a heating oven). Leave them there for like 15 minutes – they puff up a little more.

See? Puffy. Puuuuuuuu. fy.

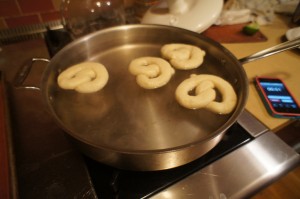
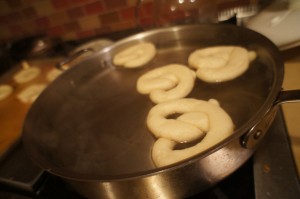
Ok. So what you do next is fill a “large wide saucepan” (just grabbed a big pot) and fill it with about 2 inches of water (you probably don’t really need that much). Throw in some baking soda and sugar, and mix it around until dissolved. THEN: you drop in about four pretzels at a time.

After about one minute of poaching, turn each pretzel over and do another minute. I used my phone as a timer for this (which you can probably see in the high quality picture above this one).

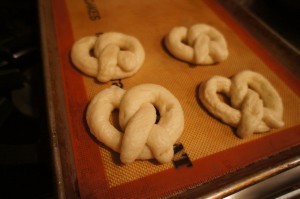
Make sure you do that for all of the 16 pretzels. Don’t worry if they’re weird and lumpy and wet and have weird holes in them and are kinda soggy and ugly. That’s how you want’em.

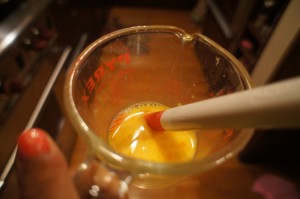
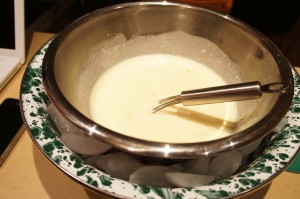
Then you wanna make an egg glaze (aka whisk an egg and a tablespoon of water together). Looks appetizing, huh.

Ok, you might not be able to tell from this beautiful natural light picture, but you just spread some of the egg glaze on each pretzel and sprinkle with salt. Go heavy on the salt, guys, unless you wanna have to shove it down your dad’s throat.

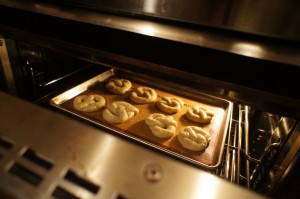
Stick’em in the oven for about 15 minutes.

…and you’re done! Not too bad. Maybe my “plan” didn’t go as expected (cough these were served at 10 cough) but people ate them (as you can tell by the pretzel being lifted away on a darth vader spatula in the background).

…and today marks the day that I successfully made pretzels! (and the day that I made something that I didn’t have to force my dad to like).

Try it, guys, and maybe one day you’ll be as cool as me.

miniature soft pretzels
Adapted from smitten kitchen

Makes 16

1 cup warm water (100°F to 110°F)
1.5 tablespoons sugar
1/2 packet active dry yeast
2.5 to 3 cups all-purpose flour, plus more for dusting
1/2 tablespoon salt
1 teaspoons canola or other neutral oil
1/8 cup baking soda
1 large egg
Coarse or pretzel salt

Vegetable-oil cooking spray

1. Pour warm water and 1/2 tablespoon sugar into bowl of electric mixer fitted with a dough hook* and stir to combine. Sprinkle with yeast, and let sit 10 minutes; yeast should be foamy.

2. Add 1/2 cup flour to yeast, and mix on low until combined. Add salt and 2 cups more flour, and mix until combined, about 30 seconds. Beat on medium-low until dough pulls away from sides of bowl, about 1 1/2 minutes. Add another 1/4 cup flour, and knead on low 1 minute more. If dough is still wet and sticky, add 1/4 cup more flour (this will depend on weather conditions); knead until combined, about 30 seconds. Transfer to a lightly floured board, and knead about ten times, or until smooth.

3. Pour oil into a large bowl; swirl to coat sides. Transfer dough to bowl, turning dough to completely cover all sides. Cover with a kitchen towel, and leave in a warm spot for 1 hour, or until dough has doubled in size.

4. Heat oven to 450°F. Lightly spray two baking sheets with cooking spray (parchment paper, ungreased, also works). Set aside. Punch down dough to remove bubbles. Transfer to a lightly floured board. Knead once or twice, divide into 16 pieces, and wrap in plastic.

5. Roll one piece of dough at a time into an 15-inch-long strip. Twist into pretzel shape; transfer to prepared baking sheet. Cover with a kitchen towel. Continue to form pretzels; eight will fit on each sheet. Let pretzels rest until they rise slightly, about 15 minutes.

6. Meanwhile, fill large, shallow pot with about 2 inches of water. Bring to a boil. Add baking soda (and step back, it foams up quickly) and remaining 1 tablespoon sugar. Reduce to a simmer; transfer three to four pretzels to water. Poach 1 minute on each side. Use slotted spoon to transfer pretzels to baking sheet. Continue until all pretzels are poached.

7. Beat egg with 1 tablespoon water. Brush pretzels with egg glaze. Sprinkle with salt. Bake until golden brown, 12 to 15 minutes. Let cool on wire rack, or eat warm. Pretzels are best when eaten the same day, but taste good the next day if you toast them.

November 7, 2011
by nycmom
0 comments

lemony lemon ice cream

We have been playing around with our ice cream maker this summer (which, by the way, we have had for over 4 years and have neglected royally!) to great effect!  Some of our favorites have been mint girl scout cookie chip and brown butter ice cream.  We haven’t quite mastered the custard base (using eggs to make a custard) which makes the ice cream really creamy and more scoopable.  So it was intriguing to us to read about Jeni’s Splendid Lemon Ice Cream which claims to be really creamy and scoopable and does not use eggs but a secret ingredient.  We had to try!
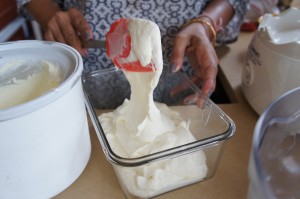
I have to say this recipe is a little more complicated than the previous recipe I had been using for a base which was essentially heavy cream, milk and sugar that had to chill over night and then you added in flavor and mix-in’s.  But it did result in a wonderfully creamy texture entirely different than the eggless base.  Magnifique!  Give it a try folks!

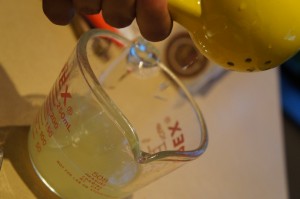
First you need to squeeze some lemons…

Make sure to have 7 year old boy on hand to make necessary sour face.


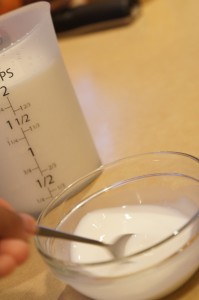
The lemons need to be zested and juiced and made into a syrup with some sugar.  Keep syrup aside to cool while you prep for the ice cream base.  The base starts with a slurry which is a mixture of milk and cornstarch (always wanted to make a slurry!)

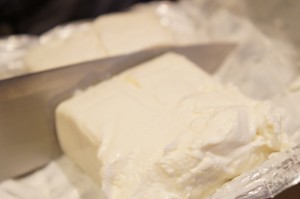
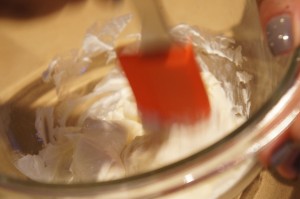
Next, whisk the cream cheese and salt in another bowl until smooth (yes!  cream cheese is the secret ingredient! But really, what DOESN”T taste better with cream cheese, huh?)


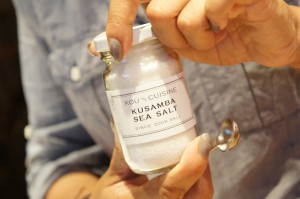
We took this opportunity to use some of our fancy salt and good ‘ole Philly cream cheese.


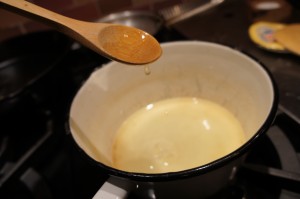
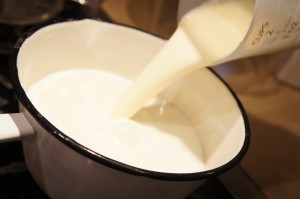
And now we are ready to fire up the stove!  In a suacepan over medium high heat combine the milk and cream,

add the sugar,

corn syrup,

and finally the lemon zest,

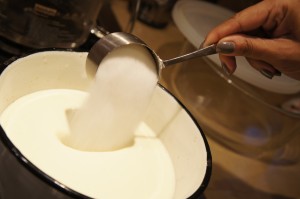
Bring to a rolling boil – for 4 minutes but watch carefully and stir!  Milky things have the tendency to boil over. Add in the slurry off heat and then bring back to a boil once again for 1 minute.  This is where things get  a little complicated…

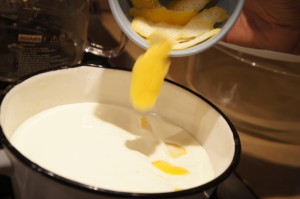
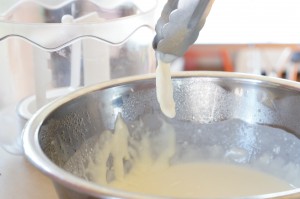
You want to gradually mix the hot milk mixture into the cream cheese mixture until smooth.  Now Jeni recommends pouring this lemony milk mixture into a gallon ziplock bag and submerging that in an ice bath to cool for 30 minutes.  Didn’ do that!  Just plopped the bowl into a bigger bowl filled with ice and let it sit for a bit and stirred it when I remembered.  That seemed to do the trick.

Almost done here!  Once your mixture has cooled down, remove the lemon zest

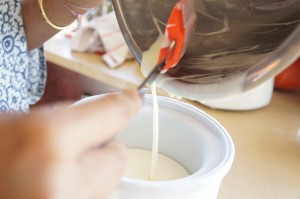
and pour into your frozen ice cream canister

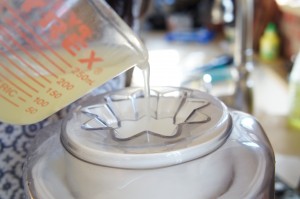
Now remember that lemon syrup we made long ago??  It’s up to bat!  While the machine is on slowly pour it in.

And that’s it!  Pack into a freezer safe container

and freeze for 4 hours at least, overnight is better.

Jeni’s right!  It sure is splendid!  So splendid in fact there are no pictures of us consuming…But take our word for it – deliciousness!

The recipe can be found at Food52 (which is an awesome website – check it out!) and I’m copying it below for your immediate consideration

Jeni’s Slendid Lemon Ice Cream

Lemon Syrup:

2 to 3 lemons

2 tablespoons sugar

Ice Cream Base:

2 cups whole milk

1 tablespoon plus 1 teaspoon cornstarch

1 1/2 ounce (3 tablespoons) cream cheese, softened to room temperature

1/8 teaspoon fine sea salt

1 1/4 cup heavy cream

2/3 cups sugar

2 tablespoons light corn syrup

Zest of 2 lemons (reserved from above)

  1. Prep for the lemon syrup: Using a vegetable peeler, remove the zest from 2 of the lemons in large strips; reserve. Halve the lemons and squeeze enough juice to make 1/2 cup. Combine the lemon juice and sugar in a saucepan and bring to a simmer over medium heat, stirring until the sugar is dissolved. Remove from the heat and refrigerate until chilled. This won’t be a very thick syrup.
  2. Prep for the ice cream base: Mix about 2 tablespoons of the milk with the cornstarch in a small bowl to make a smooth slurry. Whisk the cream cheese and salt in a medium bowl until smooth. Fill a large bowl with ice and water.
  3. Cook: Combine the remaining milk, the cream, sugar, corn syrup, and lemon zest in a 4-quart saucepan, bring to a rolling boil over medium-high heat, and boil for 4 minutes — watch it closely and stir occasionally to make sure it doesn’t boil over. Remove from the heat and gradually whisk in the cornstarch slurry. Bring the mixture back to a boil over medium-high heat and cook, stirring with a heatproof spatula, until slightly thickened, about 1 minute. Remove from the heat
  4. Chill: Gradually whisk the hot milk mixture into the cream cheese until smooth. Pour the mixture into a 1-gallon Ziploc freezer bag and submerge the sealed bag in the ice bath. Let stand, adding more ice as necessary, until cold, about 30 minutes.
  5. Freeze: Remove the lemon zest. Pour the ice cream base into the frozen canister and turn on the machine. Pour the lemon syrup through the opening in the top of the machine, and continue to spin the ice cream until thick and creamy.
  6. Pack the ice cream into a storage container, press a sheet of parchment directly against the surface, and seal with an airtight lid. Freeze in the coldest part of your freezer until firm, about 4 hours.

June 24, 2011
by nyckid
0 comments

corn on the cob…?

Hi everyone!

So I’m sure all of you are wondering where I’ve been. Well, for the next week or so, I’ll be staying at my friends’ house in NJ (which is super cool, by the way), and every morning we’ll be going to sailing camp on the Delaware River! How cool is that?!

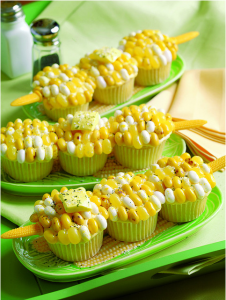
So, my friend and I decided that something fun to do over my stay would be to bake something cool – preferably cupcakes, from their book, Hello Cupcake. And as we were flipping through the book, we immediately knew that we wanted to make these:

*Note: We did not take this picture (it’s from Hello, Cupcake).*

So off we were to Wegman’s, where we proceded to buy the biggest bag of jelly beans I’ve ever seen.

Wanna know how to make these?! Sure you do! Here’s the step-by-step:

Corn-on-the-Cob Cupcakes:

Adapted from Hello, Cupcake

Ingredients:

  • 24 vanilla cupcakes baked in white paper liners
  • 1 16-ounce can of vanilla frosting
  • Yellow food coloring
  • About 3 1/2 cups of small jelly beans in assorted yellow, cream, and white colors (ex: top banana, lemon, pina colada, coconut, buttered popcorn)
  • 8 yellow starbursts
  • 1 tablespoon of white granulated sugar
  • 1 tablespoon of crushed chocolate cookies
  • 8 corn baskets (optional)
  • Green tissue paper (optional)

Instructions:

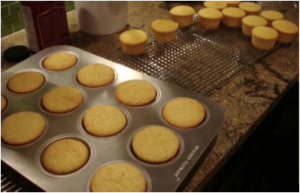
Step #1: Make sure that you have 24 cupcakes baked, cooled, and ready to go!

Step #2: Tint vanilla frosting a pale yellow w/ the yellow food coloring, and lightly frost the 24 cupcakes.

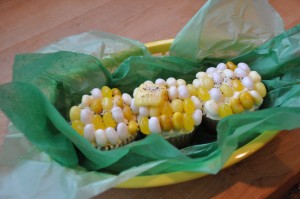
Step #3: Working w/ 3 cupcakes at-a-time (lined up in a row), arrange about 5 rows, with about 6-7 jelly beans each, close together on each cupcake.

Step #4: Slightly mold each of the starbursts (with your hands) into a shape resembling a pat of butter.

Step #5: Sprinkle sugar + cookie crumbs evenly over each ear of corn.

Step #6 (optional): Line corn holders w/ tissue paper, and place an ear of corn in each.

So – what did we think about this recipe? Well, we both decided that, ultimately, it looks a lot better than it tastes. For some reason, buttered popcorn and pina colada just don’t really taste that great together – although they do look rather nice. And there was an awful lot of jelly beans on each cupcake, which was a lot for one person to eat at once. But overall? They were a super cute, super fun project, which we would totally recommend for a summer barbeque, a picnic, or just anytime.

Give them a try! They’re corny in a good way! *bad-dum BUM*

~ nyckid + njkid

March 11, 2011
by nyckid
0 comments

donut muffins (or should that be doughnut?)

Donut or doughnut? The world may never know. For now, I’ll just refer to them as “donuts”.

Anyway – most of us, when we hear the word donut, think of deep fried goodies slathered with frosting, and maybe eaten with our morning coffee. Some of us might prefer jelly donuts, with the grape jelly that always squeezes out the side-holes like it does without fail every time. And some of us are the type who just keep popping donut holes* into our mouths one after another.

But did you know that donuts aren’t necessarily restricted to those mentioned above? Some places sell these things called “spudnuts”, which are basically potato donuts. In other parts of the world, some people fill theirs with meat or red bean paste. For example, in India, they have a savory version – vada. I’ve always been too scared to try one, but I’m sure you guys are better risk takers than I am.

In any case, I think there’s one thing we can all agree on about donuts: they are DELICIOUS.

So here’s a neat-o recipe that I tried out a couple weeks ago – baked doughnut muffins. Yup, they’re baked. So there’s no frying nonsense involved!

*Did you know that 1 regular donut = 4.6 donut holes?!

Donut Muffins:

Makes about 12 muffins

Ingredients:

For the Muffins:

  • 1 and 3/4 cup flour
  • 1 and 1/2 tsp baking powder
  • 1/2 tsp salt
  • 1/2 tsp nutmeg
  • 1/2 tsp cinnamon
  • 1/3 cup vegetable oil
  • 3/4 cup sugar
  • 1 egg
  • 3/4 cup milk

For the topping:

  • Half a stick of butter
  • 1/3 cup sugar
  • 1 Tbsp cinnamon

Instructions:

1. Preheat the oven to 350 degrees and grease a muffin tin with butter.


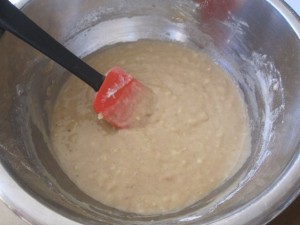
2. In a medium bowl, stir together the oil, sugar, egg, and milk.


3. Add in the flour, baking powder, salt, and spices to the wet ingredients, and stir just until combined.


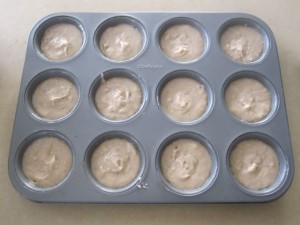
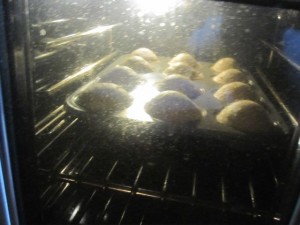
4. Spoon the batter into the muffin pan and bake 15-20 minutes or until a toothpick inserted into the center comes out clean.

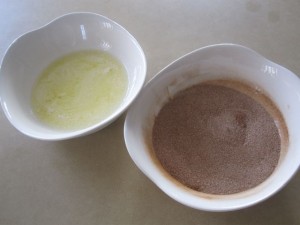
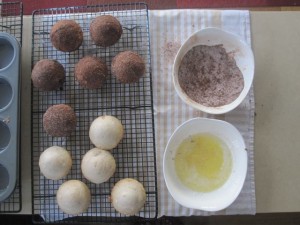
5. While the muffins are baking, melt the butter. In a small bowl, whisk together the cinnamon and sugar.


6. When the muffins are done, carefully remove them from the pan.

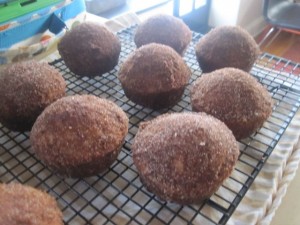
look at those domes!

7. While they are still warm, dip each one first into the melted butter, and then in the cinnamon-sugar to coat.


8. Allow to cool a few minutes before serving.

no, they’re not burnt – that’s all just cinnamon-sugar goodness…

In my honest opinion… I think these muffins were pretty awesome. Especially since there’s no deep-frying involved. I don’t think I’m the only one who would be a little freaked out about doing that.

Some things I noticed, though: I ended up doubling everything used in the topping; I didn’t seem to have enough to coat all 12 muffins with what the recipe called for. Perhaps I used too much of the topping on each muffin, which is why they looked burnt and why my picky little brother thought they were “too cinnamon-y”. But I rather liked all the extra yumminess that it added. However, I decided to leave it out of the recipe I typed up above. You know, in case you’re not as hot on cinnamon + sugar as I am (and I think you need to see a doctor if you aren’t).

Something I think might be fun to try out would be to make these in a mini-muffin tin. And maybe, by doing that, you could get away with lowering the muffin-to-topping ratio.

But anyway, some food-for-thought before I run out of room here…

Which side are you on – donut or doughnut?

January 13, 2011
by nycmom
0 comments

chicks and peeps

I have been meaning to write a post about chicken since the fall.  I guess I am not so far behind – it is still roast chicken season.  In the fall, if you remember, I would get a box from Farmer Totman every week and most weeks I would receive an organic chicken which would usually turn into friday night dinner.  Now for those of you who regularly make chicken you all know the secret of almost instant family delishiousness dinner.  You basically prep the bird and stick it in the oven until you smell something amazing emanating from your kitchen at which point you go in and peek and most times the bird is browned and ready and done!  Somehow putting a roast chicken out for dinner qualifies you as super mom on some level – it’s very June Cleaver – and if you happen to have unexpected guests you will have plenty of food for everyone and look pretty impressive on top of it all.  The real secret of you doing almost no work is yours to keep.

Now, this was a surprise to me but some people are actually afraid of roasting a whole chicken!  I must admit the first time I cooked a roast chicken I was 6 months pregnant with #1 and when I opened up the butcher paper to a 6 lb bird I started weeping at the sheer enormity of the animal.  I could not fathom how my soon to be born baby who would surely be AT LEAST this size was going to make it out into the world and one of us would not die in the process. Well, that is a story for another day but I did roast that chicken that night and it was the start of a roast chicken love affair.  And 3 months later I did have a baby the size of a small bird  – 6 lbs 4 oz – and that was the start of another love affair.  So don’t be afraid peeps!  It could lead to love!

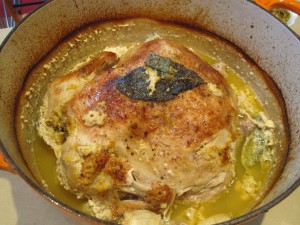
So after 12 years of roast chicken cooking these are my two favorites.  The first is Jamie Oliver’s Roast Chicken in Milk which sounds really weird and not so appetizing but I assure you folks it is one yummy meal.  It basically entails sticking the chicken in a Dutch Oven with some milk, lemon and sage and clamping a lid on it and throwing it in the oven.  The lemon and the milk although naturally not so friendly combine into a yummy sauce that you can’t stop dipping your baguette into.  Chicken, bread, somethin’ green and Bob’s your Uncle…as my darling husband likes to say.

Chicken in Milk

main courses | serves 4

A slightly odd, but really fantastic combination that must be tried.

ingredients

• 1 x 1.5k/ 3½lb organic chicken

• sea salt and freshly ground black pepper

• 115g/4oz or ½ a pack of butter

• olive oil

• 1/2 cinnamon stick

• 1 good handful of fresh sage, leaves picked

• zest of 2 lemons

• 10 cloves of garlic, skin left on

• 565ml/1 pint milk

Preheat the oven to 190°C/375°F/gas 5, and find a snug-fitting pot for the chicken. Season it generously all over, and fry it in the butter and a little olive oil, turning the chicken to get an even colour all over, until golden. Remove from the heat, put the chicken on a plate, and throw away the oil and butter left in the pot. This will leave you with tasty sticky goodness at the bottom of the pan which will give you a lovely caramelly flavour later on.

Put your chicken back in the pot with the rest of the ingredients, and cook in the preheated oven for 1½ hours. Baste with the cooking juice when you remember. The lemon zest will sort of split the milk, making a sauce which is absolutely fantastic.

To serve, pull the meat off the bones and divide it on to your plates. Spoon over plenty of juice and the little curds. Serve with wilted spinach or greens and some mashed potato.

not so pretty but oh so tasty!

The second roast chicken recipe is an Argentinian version and involves white wine and potatoes – Pollo Con Papas.  It is so simple and so delish – my kids fight over the potatoes.  The potatoes sort of carmelize on the bottom and come out crispy and soft and the chicken turns out super moist.  And it’s easypeasychocolatecheesey  (as darling son likes to say).  My friend Carol had to break her Jenny Craig for this one – the aroma overtook her! You can find that recipe here:

http://www.thecookingadventuresofchefpaz.com/2008/06/16/pollo-con-papas-a-la-florenciaflorencias-chicken-and-potatoes/

Sorry, no pics of that chicken – I make it so often I forget to take pics of it every time…until it’s too late.

Happy 2011 everyone!  Hope your house is filled with laughter and family and lots love in the kitchen.

January 3, 2011
by nyckid
0 comments

chex mix (highly addictive!)

Hey everyone!

I know, I know… I haven’t been posting much. Even now, on winter-break, I still found some way to procrastinate until just now (the last day of break!).

But right when break started, I had a craving for chex-mix. I don’t really know… I guess I had just forgotten that it had existed until then. But I really wanted it…

So I made it!

Now, let me tell you, this sounds like it makes a lot, but it’ll go fast. And anyway, even if it doesn’t, you can’t get enough chex-mix! (especially the really addictive, home-made version!)

NOTE: We didn’t really have all of the ingredients, so we improvised a bit (it was still delicious!). Our edits are written in pink.

The Cast of Characters (AKA “Ingredients”):

  • 3 cups of Corn-Chex cereal
  • 3 cups of Rice-Chex cereal
  • 3 cups of Wheat-Chex cereal
  • 1 cup of mixed nuts (We just used peanuts)
  • 1 cup of bite-sized pretzels
  • 1 cup of bagel chips (broken up into 1-inch pieces)
  • 6 tablespoons of butter (We just used a whole stick, or 8 tablespoons)
  • 2 tablespoons of Worcestershire sauce
  • 1 1/2 teaspoons of seasoned salt (We just used a mixture of regular and kosher salt)
  • 3/4 of a teaspoon of garlic powder (We didn’t have any of this, so we just added a bit more onion powder)
  • 1/2 a teaspoon of onion powder

Instructions:

1. Heat oven to 250°F.

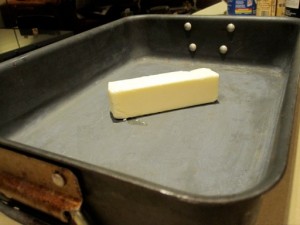
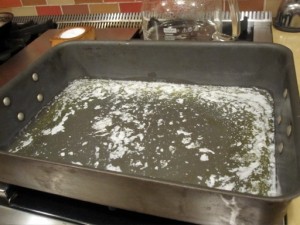
2. Put a stick of butter in ungreased large roasting pan

3. Melt the butter in the oven (you can do it while the oven’s preheating).

4. Stir in seasonings.

5. Gradually stir in cereals, nuts, pretzels and bagel chips until evenly coated.

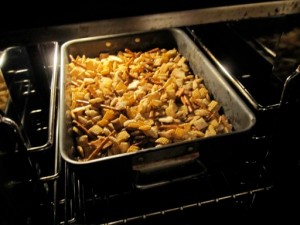
6. Bake 1 hour, stirring every 15 minutes.

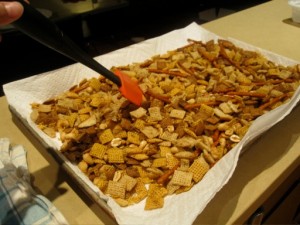
7. Spread on paper towels to cool, about 15 minutes.

8. Store in airtight container.

Soo….. I thought that this was a really yummy recipe! Even though we didn’t have all of the ingredients, and we had to improvise a bit, it still turned out super! So I guess that means that you can always mix it up a bit, if you don’t feel like running out to the store. And I think you can probably get about three batches out of the three boxes of cereal you’ll have to buy, so you’ll have an excuse to make multiple batches after the first! And always a good sign — it was gone by the next day!

Here’s what my 6-year old brother had to say: “It’s yummy, and the Chex are crunchy, and it’s buttery, and the nuts and the pretzels are terrifically crunchy and its good and its… YUM!”

…and my younger sister says: “It’s delightful, and I could eat it every day, and it’s great and it’s delicious, and it’s super flavorful, and everybody should love it!”

So take their advice… and go make it!

November 6, 2010
by nycmom
0 comments

fresh lime soda… i miss you!

Needless to say I have been absent.  And no good excuses here – just summer and traveling and sister’s wedding and school and just life.  You know how sometimes life takes over and you just don’t have time for stuff?  That long list of to-do’s? Those appointments you need to make and that desk you need to clear off?  And last year’s art projects that need to be saved forever or discreetly made to disappear?  And suddenly it’s almost November and your kid’s are still wearing sandals and shorts??  Yeah – that’s the life stuff I’m talking about.

So now it’s fall and we are back in school and back in NYC and back to life.  I was just daydreaming today about all the yummy food we had in the nice warm places we visited this summer (while I pulled on my Uggs, mind you) and thought I might share some pictures.  I should have taken so many more but most times I am just too excited to dig in and think of pictures until there is really not much left to take pictures of.

And about that fresh lime soda.  Everywhere you go in India you can get a fresh lime soda which consists of freshly squeezed lime juice, a little tumbler of simple syrup and a bottle of bubbly soda water.  You get to make it your way.  You can have it sweet or salty.  You can have it sweet AND salty.  And you can have it with vodka if that is what you are needing that day.  It is the first thing I order when I land in India and the last thing I have before I leave.  Just can’t get it here.  Plus the limes are different.  And the air.  And the bubbly water in the cute glass bottle.  Fresh lime soda is India.  I miss you!

Here are a few of the memorable meals.

and of course don’t forget to

October 14, 2010
by nyckid
0 comments

banana “ice cream” (one ingredient!)

Hey everyone! Sorry for not posting for such a looooooong time. My hw is going nuts. I’m amazed I had time to write this! But we’ve got plenty more coming for you, so stop complaining! Yeesh.

We were vacationing in India and Hong Kong over the summer – there were some pretty funky dishes there, too! Nycmom will be posting on them in a little bit.

But Fall’s finally here, people! (mmm…I can smell the pumpkin choco chip bars already!) So even though I actually made this recipe over the summer and even though it’s a summer recipe, I’m sure you’ll still love it. Especially the fact that it’s made with ONLY ONE INGREDIENT!

“How can you make ice cream using only one ingredient?” you may ask. “Why are there quotation marks around ‘ice cream’?”Why is bacon so good??” “Why am I writing this so late at night???” “WHY???!!!”

Well, I’ll tell you why. One word – BANANAS!

Yup, that’s right. This ice cream is only made out of bananas! Which is another plus because I’m pretty sure bananas are in season all year round.

Here’s the recipe:

Ingredients:

  • 3-4 bananas
  • mix-ins, such as choco chips, peanut butter, nutella, etc. (optional)

Instructions:

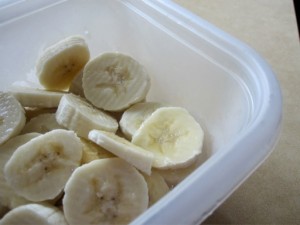
1. Cut the bananas into 1/4 to 1/2 disks and put them in a tupperware into the freezer.

2. After a couple hours, or until the disks are completely hardened, dump them into a food processor.
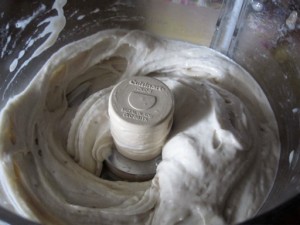
3. Keep pulsing the banana disks. At one point they’ll look like banana gravel.
Keep on pulsing. You might want to scrape down the sides or spread/even out the mush at points.
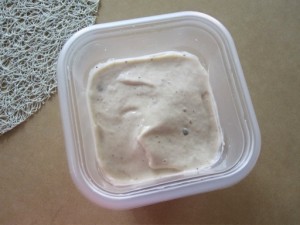
4. But keep pulsing until it suddenly turns into a creamy banana “ice cream”-y treat!

5. At this point, you can mix in things like chocolate chips, peanut butter, nutella, etc.
6. Then, serve immediately. The texture will be like soft serve, but for regular, harder ice cream, freeze it in a tupperware for a couple hours.

7. Eat up!

This recipe was actually just like soft serve if you ate it straight from the processor to the bowl. But after a while, as it melted, it started to taste more like mushy banana. So maybe using a stronger mix-in than choco chips (ex: pb?) would make it taste better.

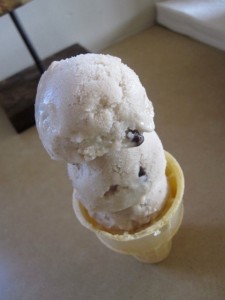
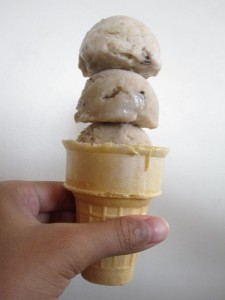
But if you haven’t noticed yet, it’s made out of only bananas! So it’s super healthy! :). And, like I said before, if you stick this in the freezer for a bit, it’ll be like hard ice cream! It’s pretty good in this stage for piling up in stacks of scoops! (as you can probably tell by the pix, I got a little carried away).

So, back on topic, this ice cream was pretty cool! And we have a bunch more posts coming up, people! Stay tuned! Don’t walk away! I’m looking at you! No, not you – next to you, no, the other guy – yeah you. DON’T GO ANYWHERE.

Oh and actually, one more really exciting thing:
Well, you guys all know about cake balls, right? (you’d better). So anyway, I sent some pix of them to the one and only Bakerella and…… (click here)

YEEEEEE-HAWWWW

July 19, 2010
by nyckid
0 comments

martha stewart (da queen of cookies)

Well, that and all other good things, for that matter. (hehe)

Let me explain. The other day, we had too many eggs. And I mean we had wayyy too many eggs. We had so many eggs we were giving them away as presents! So, I decided to make some baked goodies from:

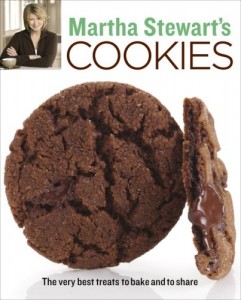
Martha Stewart Cookies!!!!!

There were a lot of cookies to choose from, but eventually, I decided on sugar cookie cutouts, and peanut butter swirl brownies. (technically, those aren’t cookies, but they were in the book!)

Sugar Cookie Cutouts:

Ingredients:

  • 4 cups sifted* all purpose flour, plus more for dusting
  • 1 teaspoon baking powder
  • 1/2 teaspoon salt
  • 1 cup (2 sticks) unsalted butter, room temperature
  • 2 cups sugar
  • 2 large eggs
  • 2 teaspoons pure vanilla extract

Instructions:

  1. Sift flour, baking powder, and salt into a bowl.
  2. Put butter and sugar in the bowl of an electric mixer fitted with the paddle attachment. Mix on medium speed until pale and fluffy. Mix in eggs and vanilla. Reduce speed to low. Gradually mix in flour mixture. Divide dough in half; flatten each half into a disk. Wrap each in plastic. Refrigerate until firm, at least 1 hour or overnight.
  3. Preheat oven to 325 degrees with racks in upper and lower thirds. Let one disk of dough stand at room temperature just until soft enough to roll, about 10 minutes. Roll out dough on a lightly floured work surface to just under 1/4 inch thick, adding more flour as needed to keep dough from sticking. Cut out cookies with a 4-to-5-inch cookie cutter, transferring shapes to parchment paper-lined baking sheets as you work. Roll out the scraps, and repeat. Repeat with remaining disk of dough. Transfer baking sheet to freezer, and freeze until very firm, about 15 minutes.
  4. Bake, switching positions of sheets and rotating halfway through, until edges turn golden, 15 to 18 minutes. Let cool on sheets on wire racks.
  5. Decorate however you want! We dipped half of each cookie into a bowl of candy melts, and then decorated with sprinkles. Be creative!

*Here’s a tip: you don’t have to sift the flour! Ever!

Peanut Butter Swirl Brownies:

Ingredients:

For the batter:

  • 1/2 cup (1 stick) unsalted butter, cut into small pieces, plus more for pan
  • 2 ounces unsweetened chocolate, coarsely chopped
  • 4 ounces semisweet chocolate, coarsely chopped
  • 2/3 cup all-purpose flour
  • 1/2 teaspoon baking powder
  • 1/4 teaspoon coarse salt
  • 3/4 cup granulated sugar
  • 3 large eggs
  • 2 teaspoons pure vanilla extract

For the filling:

  • 4 tablespoons (1/2 stick) unsalted butter, melted
  • 1/2 cup confectioners’ sugar
  • 3/4 cup smooth peanut butter
  • 1/4 teaspoon coarse salt
  • 1/2 teaspoon pure vanilla extract

Instructions:

  1. Preheat oven to 325 degrees. Butter an 8-inch square baking pan and line with parchment, allowing a 2-inch overhang. Butter lining (not overhang).
  2. Make batter: Put butter and chocolates in a heatproof medium bowl set over a pan of simmering water; stir until melted. Let cool slightly. Whisk together flour, baking powder, and salt in a bowl.
  3. Whisk granulated sugar into chocolate mixture. Add eggs, and whisk until mixture is smooth. Stir in vanilla. Add flour mixture; stir until well incorporated.
  4. Make filling: Stir together butter, confectioners’ sugar, peanut butter, salt, and vanilla in a bowl until smooth.
  5. Pour one-third of batter into prepared pan; spread evenly with a rubber spatula. Drop dollops of peanut butter filling (about 1 tablespoon each) on top of batter, spacing about 1 inch apart. Drizzle remaining batter on top, and gently spread to fill pan. Drop dollops of remaining filling on top. Gently swirl peanut butter filling into batter with a butter knife, running the knife lengthwise and crosswise through layers.
  6. Bake until a cake tester inserted into brownies (avoid center and edges) comes out with a few crumbs but is not wet, about 45 minutes. Let cool slightly in pan, about 15 minutes. Lift out; let cool completely on a wire rack before cutting into squares. Brownies can be stored in an airtight container at room temperature up to 3 days.

So, here’s some stuff I noticed. The sugar cookies were supposed to make “2 dozen 4-inch cookies”. And we got at least 50. But that’s probably because we used different sized heart cookie cutters, and I doubt all of them were 4-inch. So, yeah. If you don’t want a lot of cookies (and I mean A LOT), stick to the 4-inch cutters. 🙂

And for the brownies, the swirl trick might sound confusing. I know I was confused. So basically, you just have to put blobs of peanut butter filling on top, and take a butter knife, and drag it through them in a criss-cross pattern. And make sure the tip of the knife hits the bottom of the pan.                                                                                                                                                                                                            And something I realized while typing up the recipe: I think I forgot to put in half the chocolate. But it tasted fine to me, so if you don’t really like a lot of chocolate, just leave it out!

So stay tuned, folks! Coming up next: INDIA!!!

July 10, 2010
by nycmom
0 comments

snake river ranch cookies

Our family was lucky enough to be invited to our friend’s ranch in Jackson Hole, Wyoming this summer.  We had never been to this part of the US before so we were very excited to explore.  If you have never been to Jackson – go!  My gosh – there is so much to do here the – days are long and full.  The sun doesn’t seem to set until after 9 and today when I opened my eyes at 5:40am the sun was already up.  Horseback riding, tubing, white water rafting, swimming, hiking, singing cowboy songs with the wrangler, s’mores by the bonfire – endless!

The day’s activities are planned around breakfast, lunch and dinner which is served at the ranch in a dining cabin and are quite a highlight in the day.

Dining Cabin


See the bell up at the roof?  It is rung 6 times a day – once to warn you and once to say the meal is served.

ready for lunch!


Yesterday for lunch we had cold cuts and salad and pasta salad and lemonade and iced tea and ranch honey.  And for dessert a wonderful cookie with a surprise icing.  It was sort of like a black and white cookie  – kind of soft and cakey.  And the frosting looked like it would be lemony but surprise! It was cream cheesey and almondy – yum!  Had to ask the cook for the recipe.

Celesta and her cookies


And after a littler flattery she was happy to share:

Snake River Ranch Sugar Cookies

  • 1 cup butter
  • 2 cups sugar
  • 2 eggs
  • 4 cups sifted flour
  • 1/2 teaspoon salt
  • 1 teaspoon baking soda
  • 2 teaspoon baking powder
  • 2 tablespoons cornstarch
  • 1 cup buttermilk
  • 1 teaspoon vanilla

Now, Celesta did not give me much more in terms of directions but I imagine you just mix the butter and add the sugar and then the eggs.  Then alternate all the dry ingredients with the buttermilk until combined.  She said if the dough rests overnight in the refrigerator it is easier to handle.

Drop onto a cookie sheet and bake at 375 for 8-10 minutes.

When the cookies are cooled they can be frosted.  Now, Celesta also did not give me a cream cheese frosting icing recipe – she just wrote “Cream Cheese frosting with almond flavoring” –  but I’m guessing if you mix a room temperature block of cream cheese with a cup of sifted confectioner’s sugar, a 1/4 cup of softened butter and add a teaspoon of almond extract you will get pretty close to the SRR recipe.   I guess Celesta wanted to keep some secrets after all.